About GIMP
GIMP is an acronym for GNU Image Manipulation Program. It is a freely distributed program for such tasks as photo retouching, image composition and image authoring.
It has many capabilities. It can be used as a simple paint program, an expert quality photo retouching program, an online batch processing system, a mass production image renderer, an image format converter, etc.
GIMP is expandable and extensible. It is designed to be augmented with plug-ins and extensions to do just about anything. The advanced scripting interface allows everything from the simplest task to the most complex image manipulation procedures to be easily scripted. It is available for GNU/Linux, Windows and Mac OS X.
{mobile_block=responsive_ad_728_90}
What you should know about business cards
Here are some of general things you should know about work with business cards
- A standard business card size is 90x50 mm. You are free to use any other size but this is a recommended
- Even the size of a business card is 90x50 mm we need to add 3 mm margins that will be cut off after printing, so we'll need to have 96x56 mm image file at the end of the process
- Business card should be delivered to the printing company usually in .tiff format, additional it could be .eps or .psd
- Image resolution should be 300 dpi (dots per inch)
- All other things are as working with any other image file preparing for printing
Creating business card with GIMP and gedit
For this purpose we're going to create a very simple geeky business card using gedit and GIMP only.
gedit is the official text editor of the GNOME desktop environment. While aiming at simplicity and ease of use, gedit is a powerful general purpose text editor.
So, let's begin.
1) Run gedit and resize the window to have a common business card's proportions.
2) You can remove toolbar and statusbar, but I'm going to remove line numbers only
To remove toolbar and statusbar:
View > deselect Toolbar and Statusbar
Remove line numbers:
Edit > Preferences > View > deselect Display line numbers
3) Select font and size
Select font and size, but do not set small not too big size.
To select font in gedit:
Edit > Preferences > Fonts & Colors
4) Save file as you wish, e.g. INFORBIRO Business Card.txt
{mobile_block=responsive_ad_2_300_250}
5) Enter some geeky text. I've entered my company information in XML format
6) Create a screenshot of gedit window
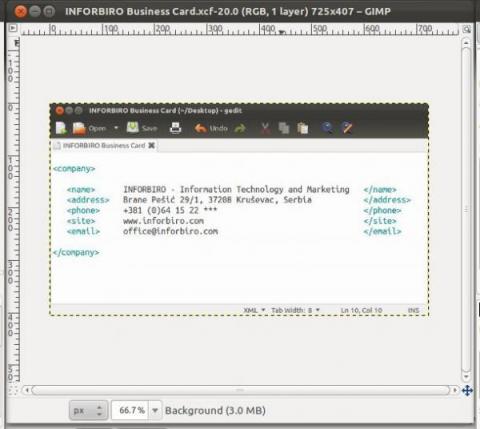
Run GIMP and File > Create > Screenshot... > set 3 seconds and after that click on the gedit window
This will create a new image into GIMP window.

7) Change image resolution and size
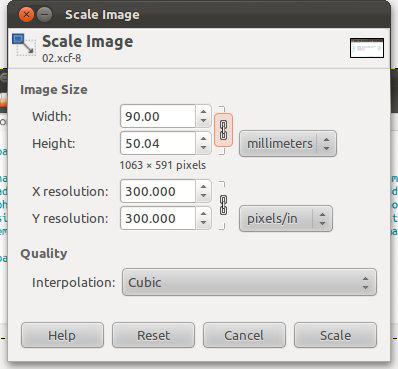
Image > Scale Image... > change resolution to 300 dpi, change measure unit to millimeters and set width to 90 mm and height to 50 mm.

8) Resize canvas area in order to add additional 3 mm margins that will be cut off after printing
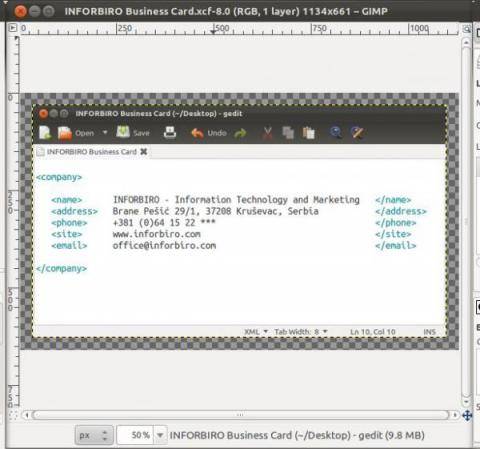
Image > Canvas Size... > set 96 mm for width and 56 mm for height and click Center button in order to put the image into the middle with 3mm margins around it.

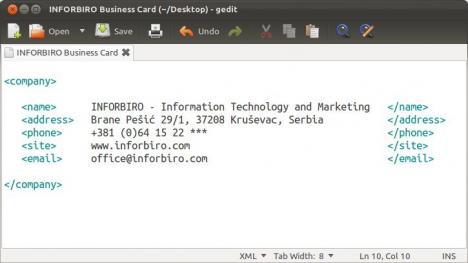
9) Now, we have ready business card!

If you want you could add some effects or some other information, e.g. logo, your own picture...
After printing the business card will look like:

{mobile_block=responsive_ad_728_90}
